Game 4 - Dwarves - Sam - Blood and Glory
This time I had to face one of the most difficult armies for me to play against - Dwarves! It was also a Blood and Glory scenario with modification. If one of the army was broken, the game continued but the player who broke the opponent got extra victory points. Sam, against whom I played this round, brought the following:
Dwarves - Army List
Runelord, Anvil of Doom, Shield, M. Rune of Balance, Rune of Spellbreaking, Rune of Stone
BSB, M. Rune of Grungni, Rune of Guarding, Rune of Slowness
Thane, GW, Xbow, M. Rune of Gromril, M. Rune of Challenge, Rune of Brotherhood, Rune of Furnace
29 Warriors, Shields, Full Command
24 Quarrellers, Great Weapons, Full Command
20 Thunderers, Full Command
20 Longbeard Rangers, GW, Full Command, Rune of Determination
Cannon, Rune of Forging, Rune of Burning
Grudge Thrower, 2 x Rune of Penetrating
Organ Gun
I am not sure about the details as the army list I got from TO is different to what I faced but I hope the characters are the same.
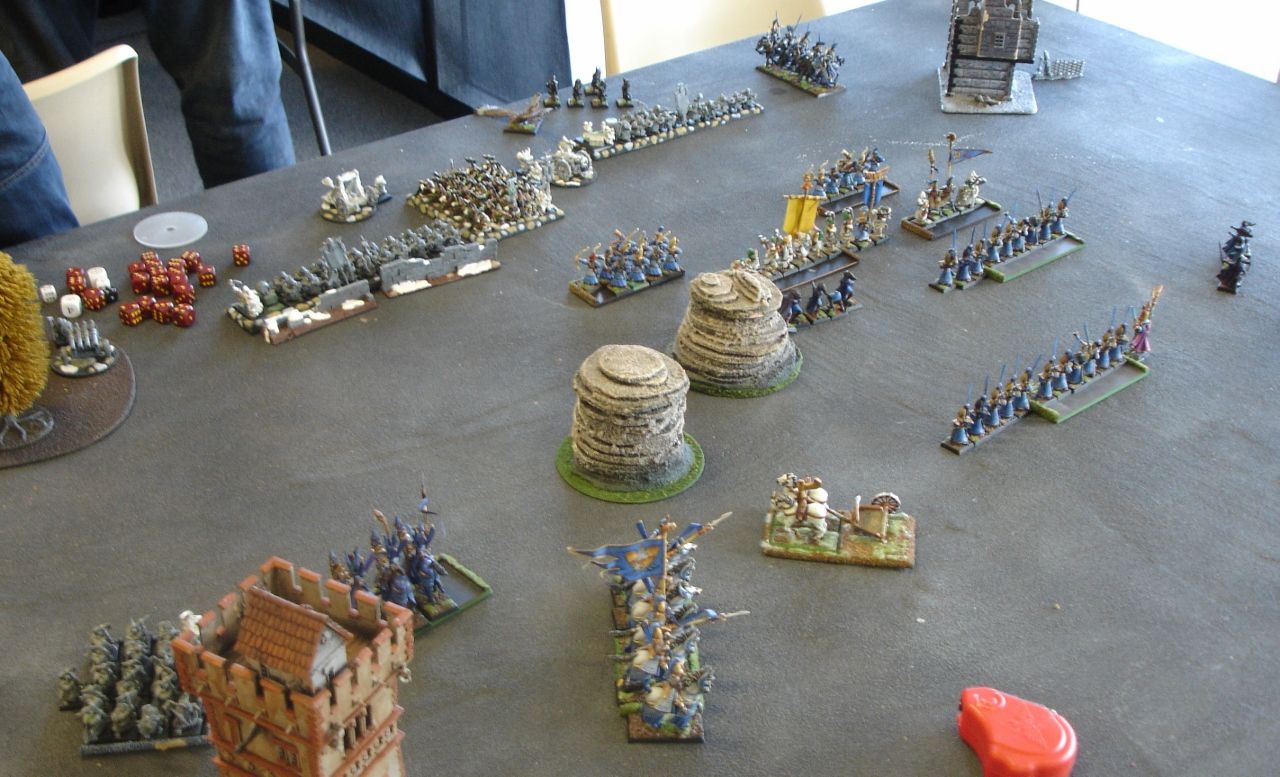
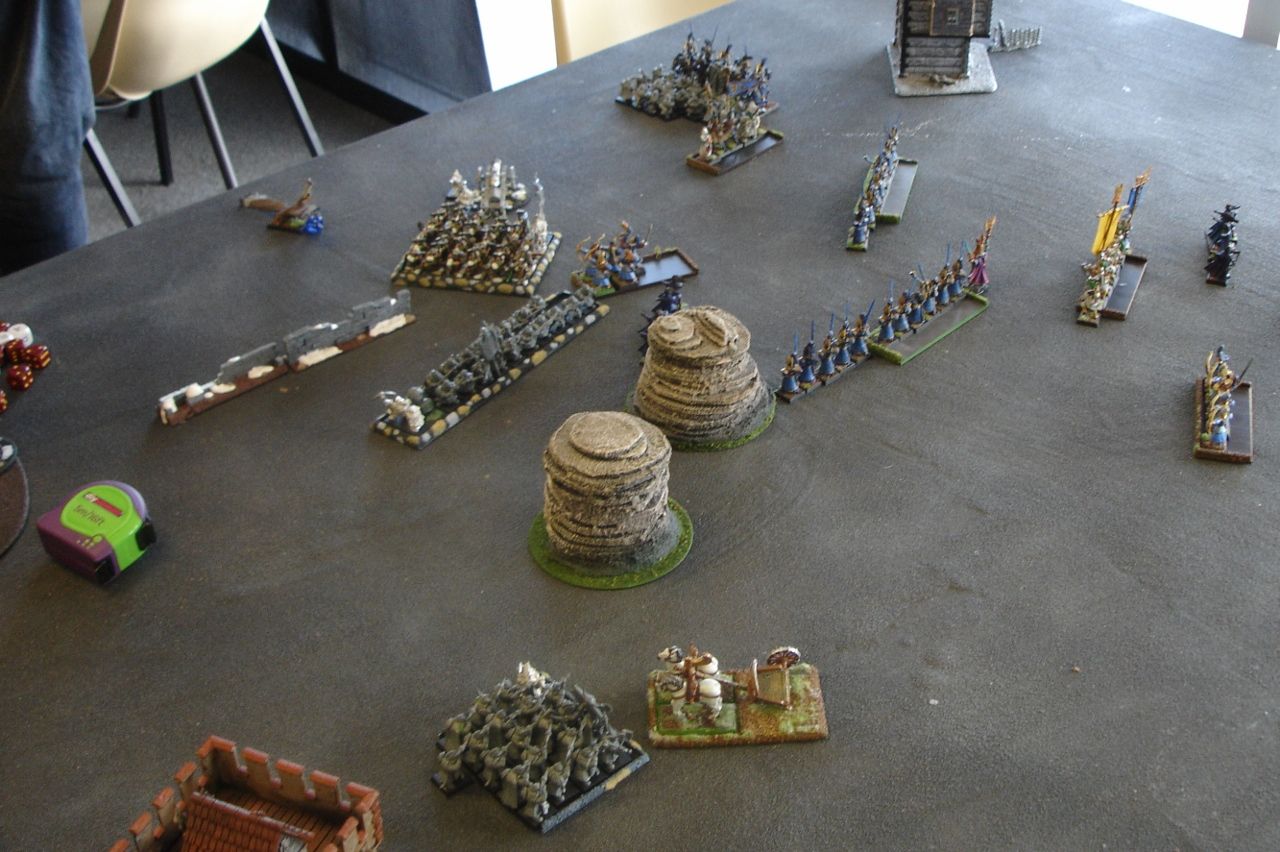
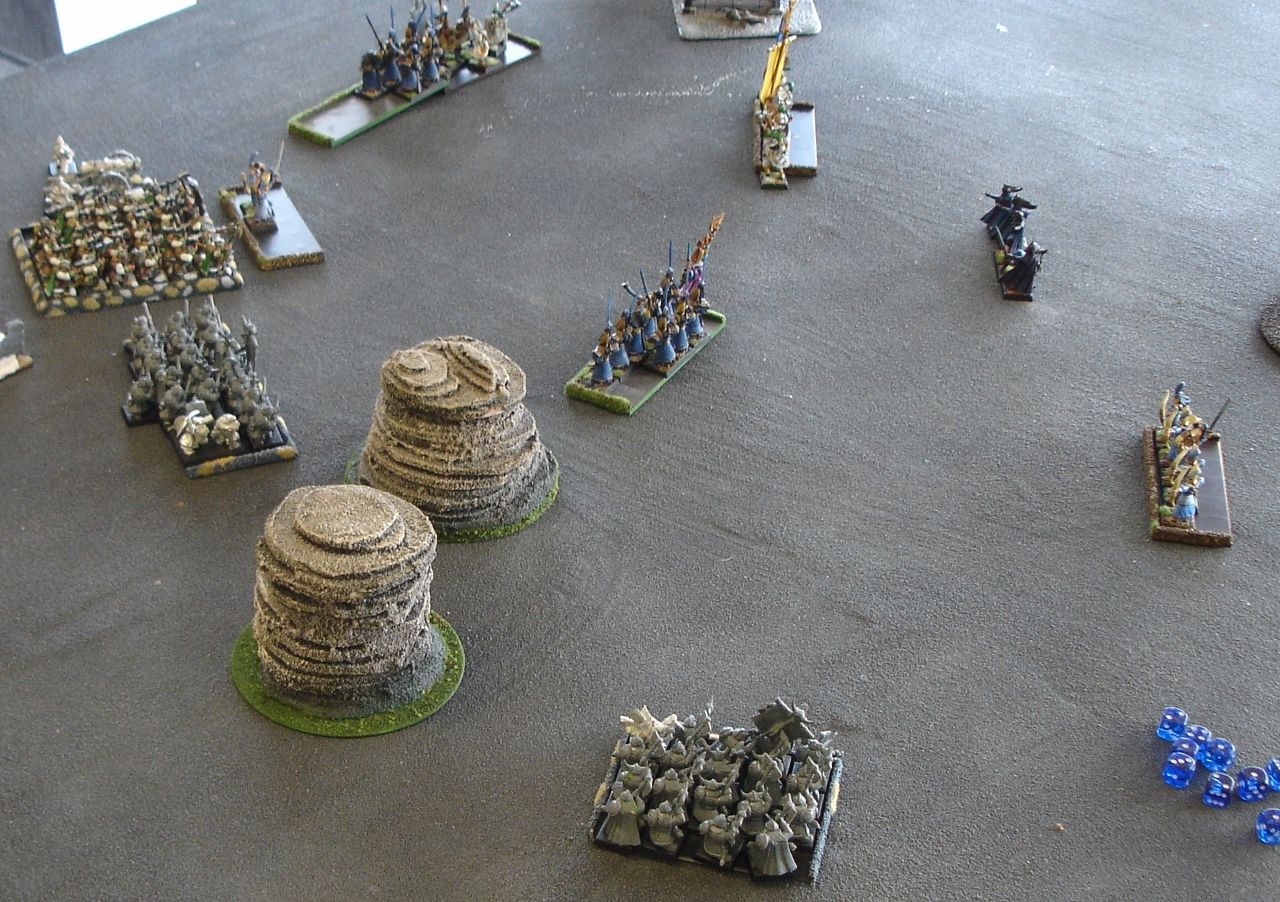
Hm, Blood and Glory means the deployment zones are a little closer and flanks have to be empty for that purpose. That means Dwarves cannot form their castle in the corner. But could as well form it close enough. Sam had traditionally looking army and that meant trouble. His shooters are not only dangerous to my small units but they can also fight in close combat well. Especially crossbows with great weapons. A good mixture of war machines didn't make the things easier but at least there were only three of them and "only" one organ gun :)
Rangers with Thane were a problem too. They could nicely counter my deployment and Rune of Challenge can be really nasty with them. But as it is hard to predict if they are going to be deployed as scouts or rather, if they are going to be deployed far forward, I decided to worry about it as soon as I saw were they are.
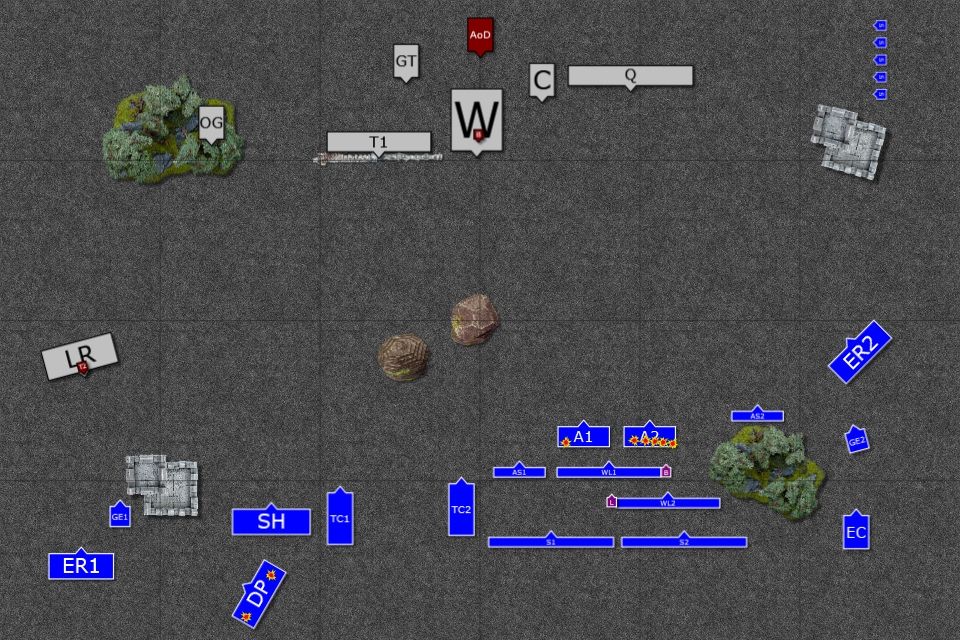
Anvil of Doom is always a pain and I expected it will cause a lot of trouble. I decided to deploy in many thin lines to avoid the grudge thrower as a single shot with S5 hits can easily destroy whole units. I also knew that shooting will be very limited so I wanted to use archers as a first wave instead. Yes, I was going to try and win against Dwarven castle. Crazy idea as it may be I needed to keep trying!
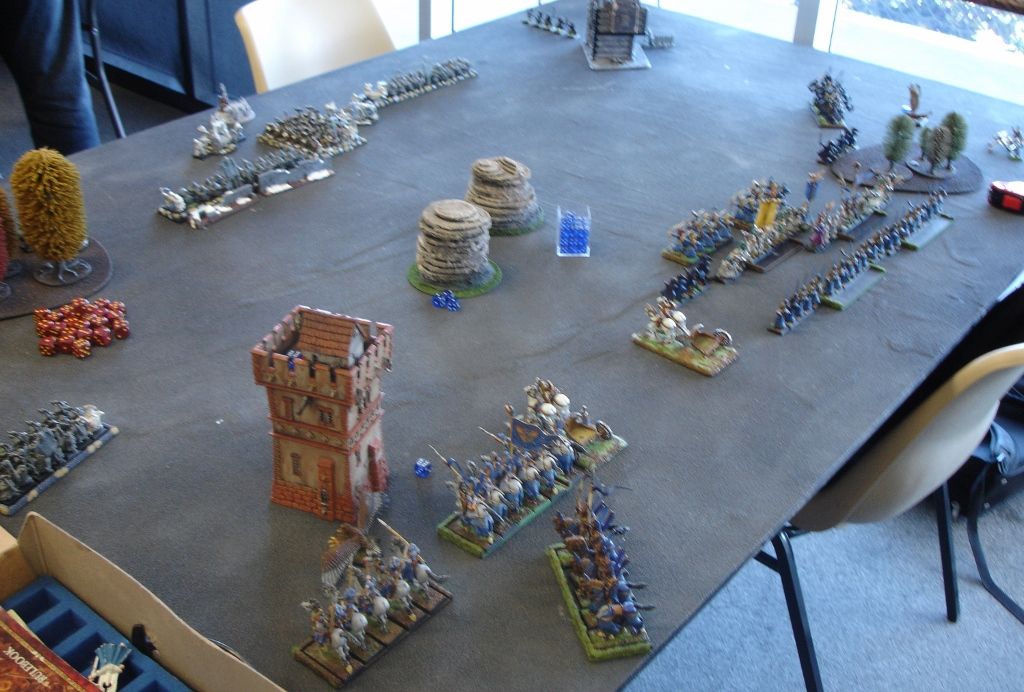
Looking at the battle field I noticed that it had to be divided into two halves. Hence, I had to advance from both flanks or try to deploy everything on one side. I decided to spread forces a little.
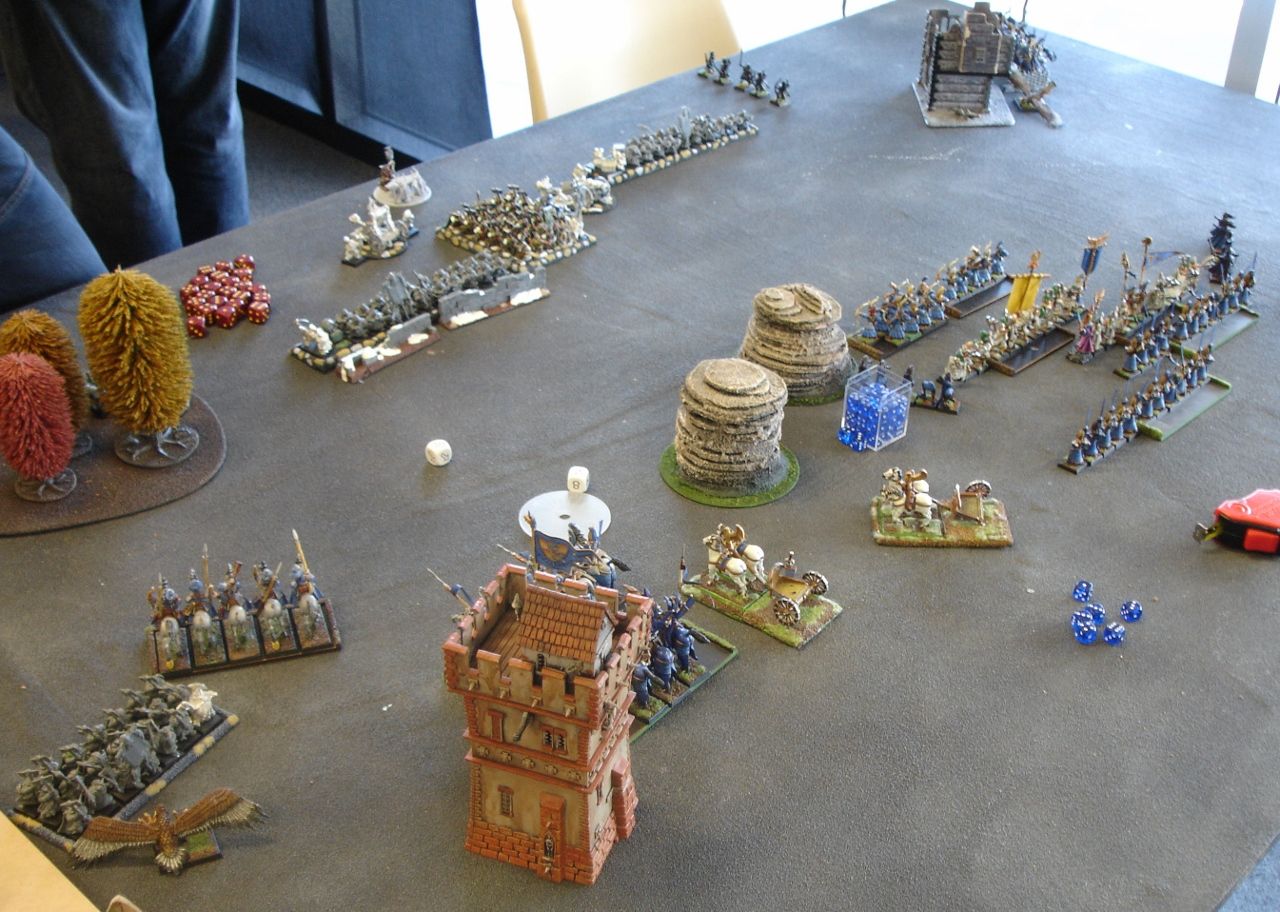
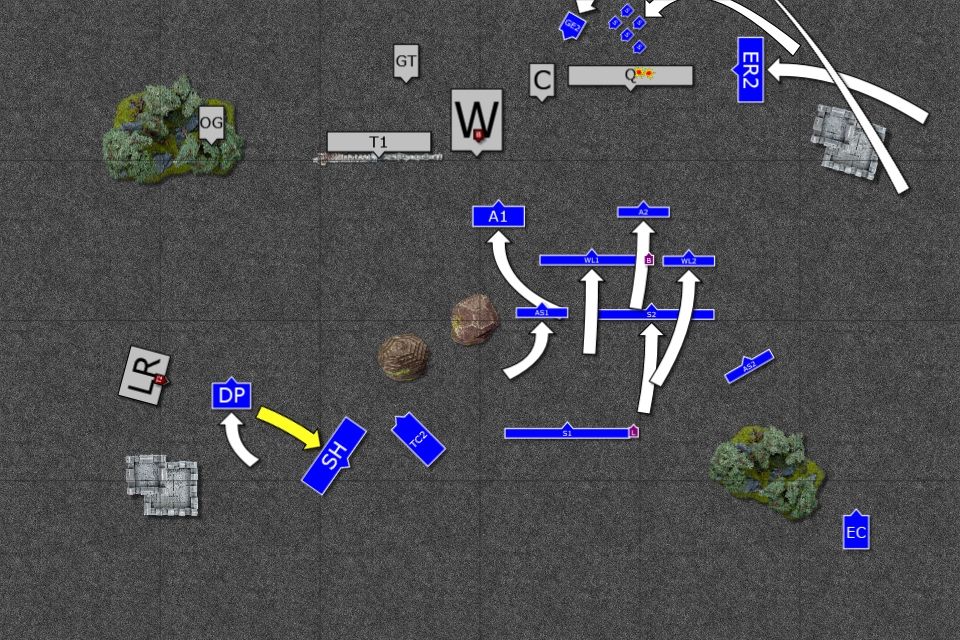
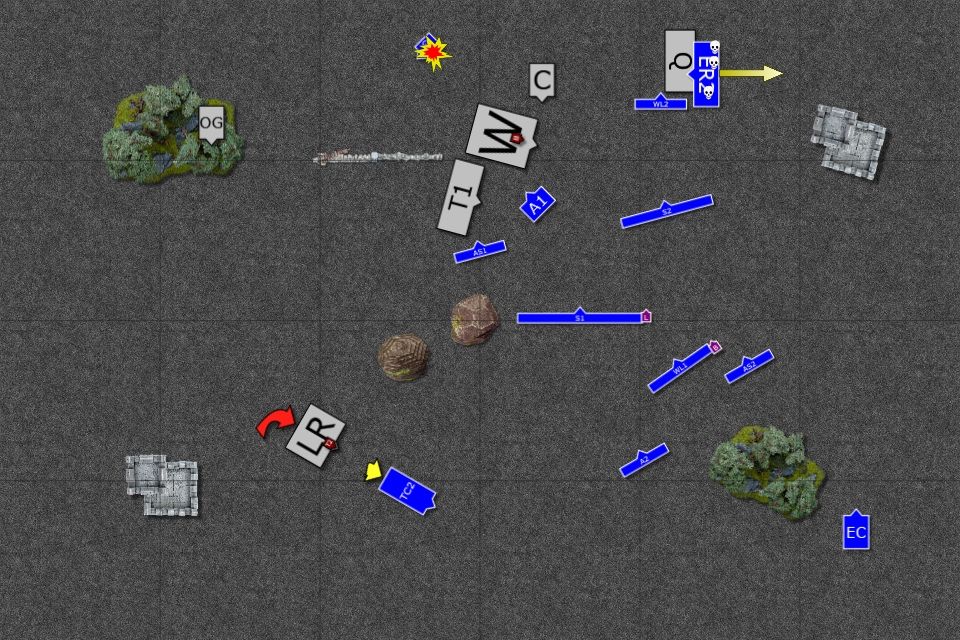
Deployment
 |
| War of the Beard - yet another episode! |
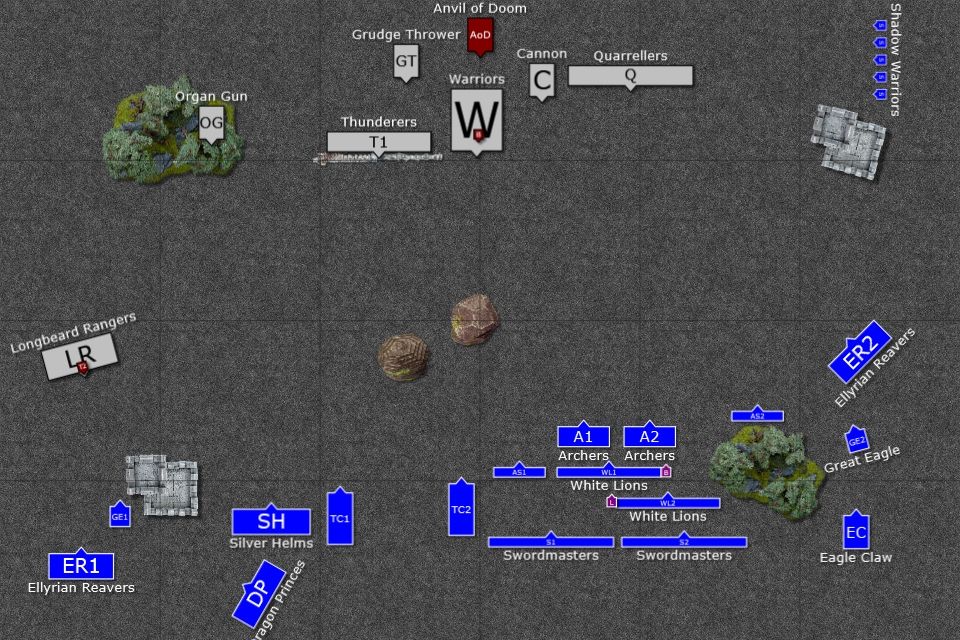
As expected Rangers were a problem. :) I didn't know when they are going to use the rune of challenge and with anvil movement I could expect some nasty charges. At least they didn't have throwing axes!
Rocks in the middle were as much cover as a problem. From one point of view they limited amount of targets for thunderers but at the same time narrowed path to the flank of the enemy formation.
I wanted to bypass rangers and use the cavalry to destroy organ gun. It was very risky business as thunderers were there to help.
I was totally at a loss what to do with chariots :( They seem free points against cannons I didn't even want to deploy them. I also felt crowded on the other flank but at a time it seemed like a good idea. I also had open right flank to advance with fast troops and avoid nasty shooters.
Unfortunately, I didn't get first turn, that might be very helpful here. Let's see what nasty surprises Dwarves had for me!
Dwarves - Turn 1
 |
| Who needs to move when enemy will come to you anyway? :) |
 |
| Shooting warm up |
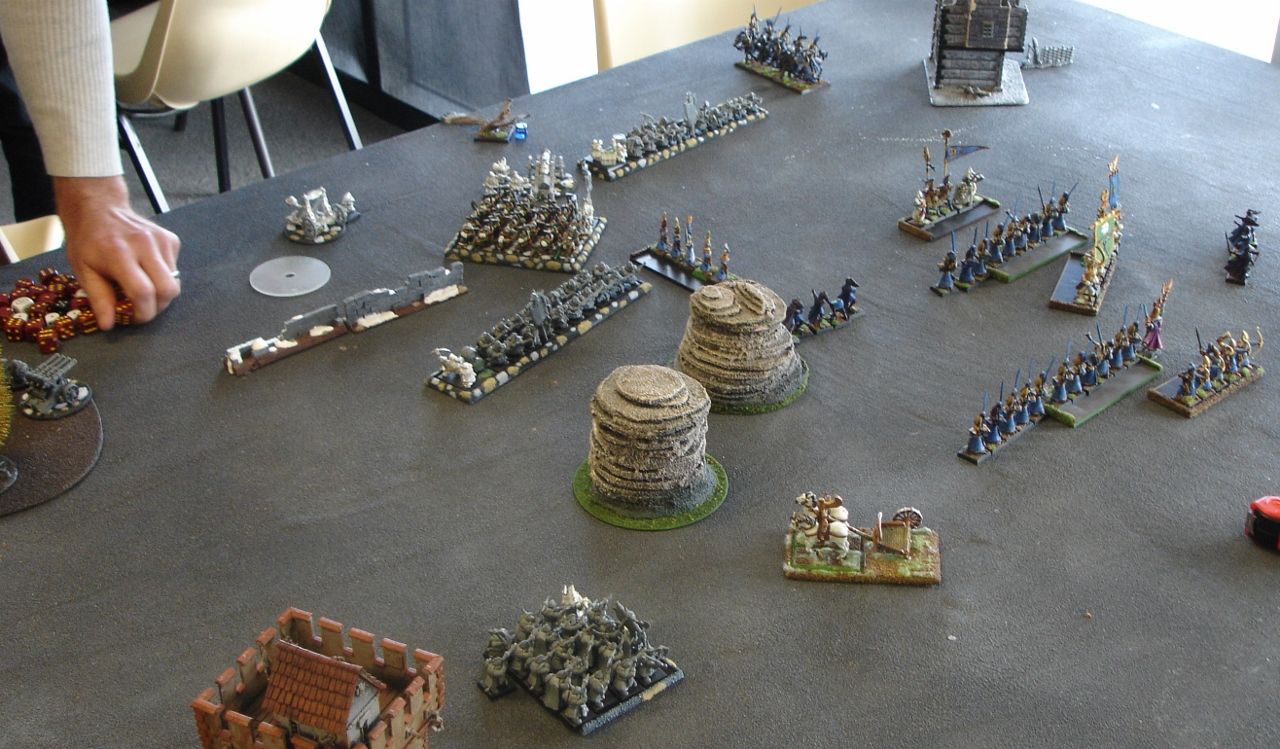
Dwarves, confident in their impregnable formation, didn't even flinch. The war machines opened fire as did the quarrellers. A few elves fell here and there but it was clear it was not yet the hell Dwarven gunline can unleash.
Outcasts - Turn 1
Outcasts - Turn 1
 |
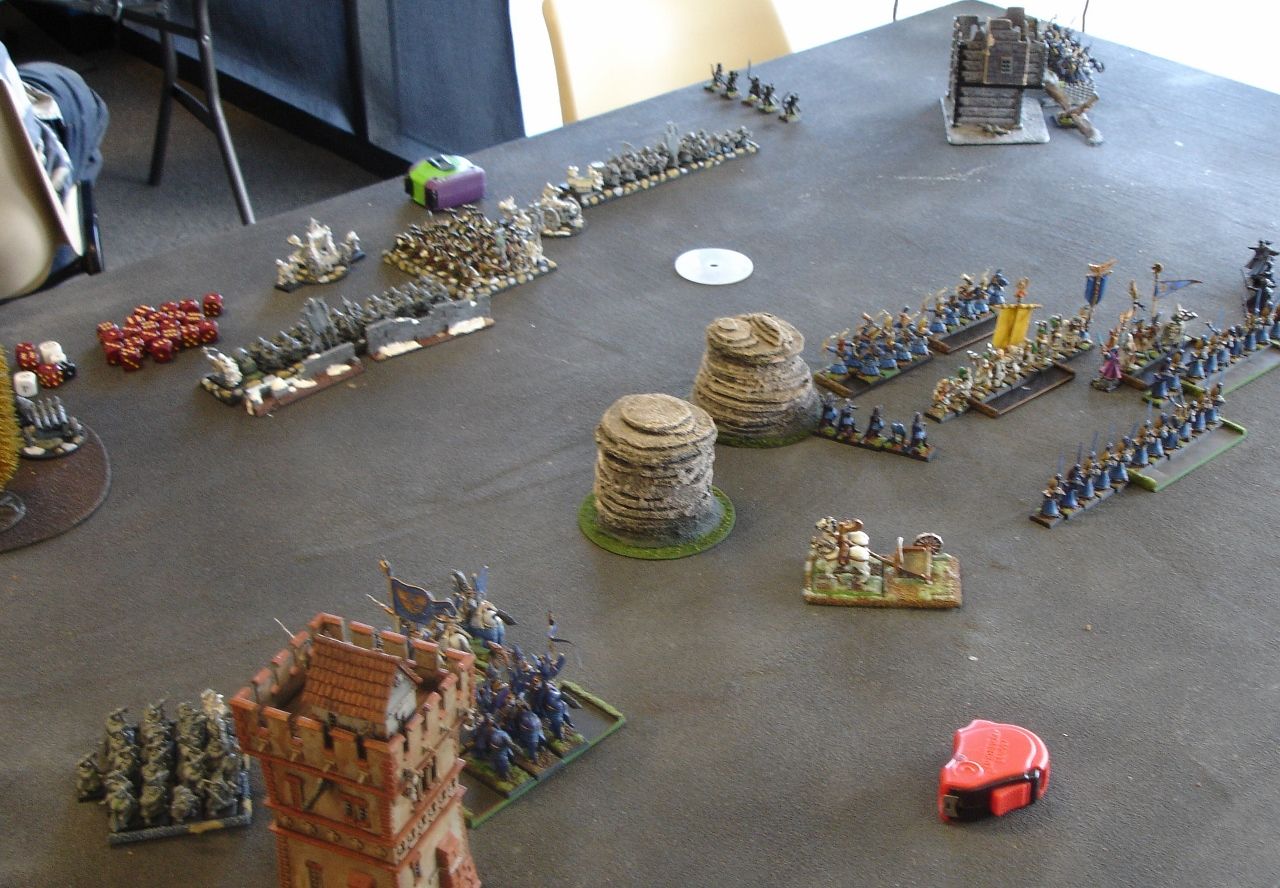
| On the contrary, Elves move fast |
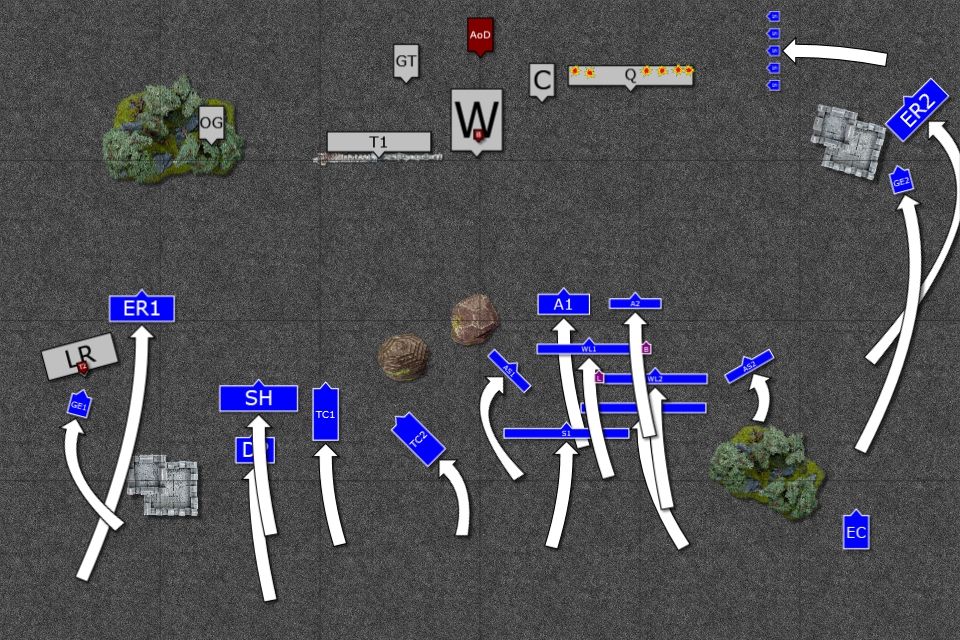 |
| But show they can shoot too! |
Almost entire elven army moves at a double. On the far East light troops use the cover in wide outflanking manoeuver. Even the shooters moved as fast as possible with the exception of one regiment of Sisters and Eagle Claw who started thinning down some quarrellers. On the West cavalry also moved forward, although a little bit shy as they all faced organ gun and a group of grumpy thunderers.
Dwarves - Turn 2
 |
| Fireworks! |
 |
| Anvil explodes! |
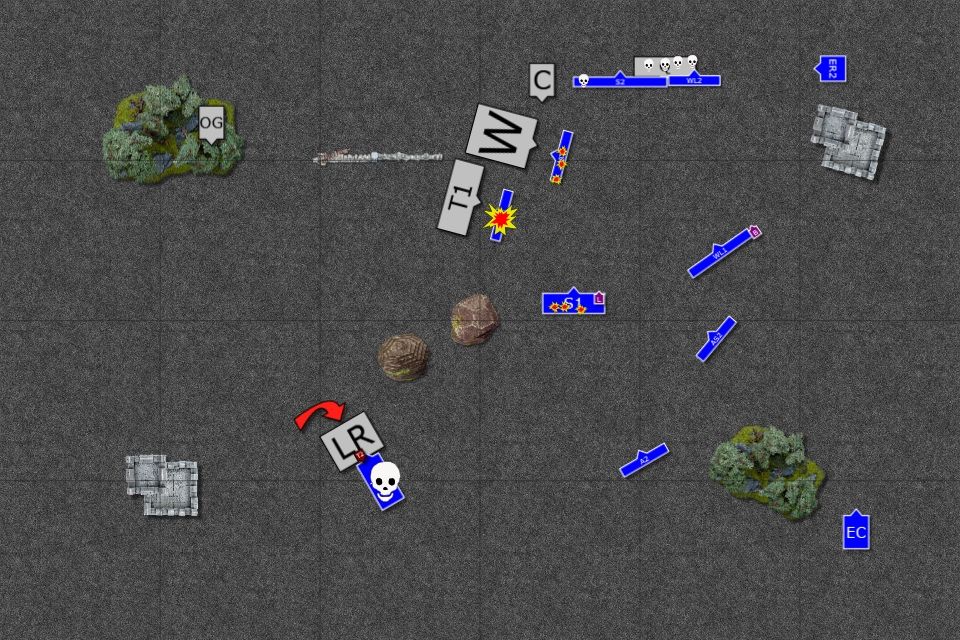
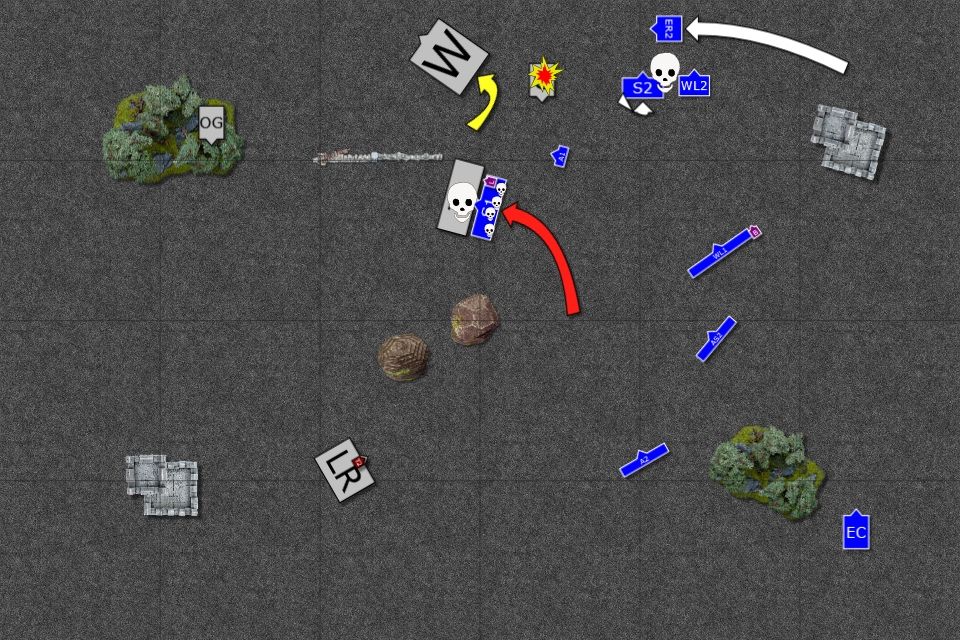
Rangers reform swiftly and use the gap between the elven units to move towards the flank of the cavalry formation. All around them fire of various colours erupts and it does feel like some kind of celebration. The only difference is that together with disappearing fireworks great eagle, chariot and full unit of reavers perish too.
Quarrellers aim at White Lions this time and it seems their furs are for decorative purposes only as half of the unit dies to well placed crossbow bolts.
Unfortunately for Dwarves, something goes terribly wrong with the anvil and the ancient artifact explodes taking lives of runelord and his apprentices.
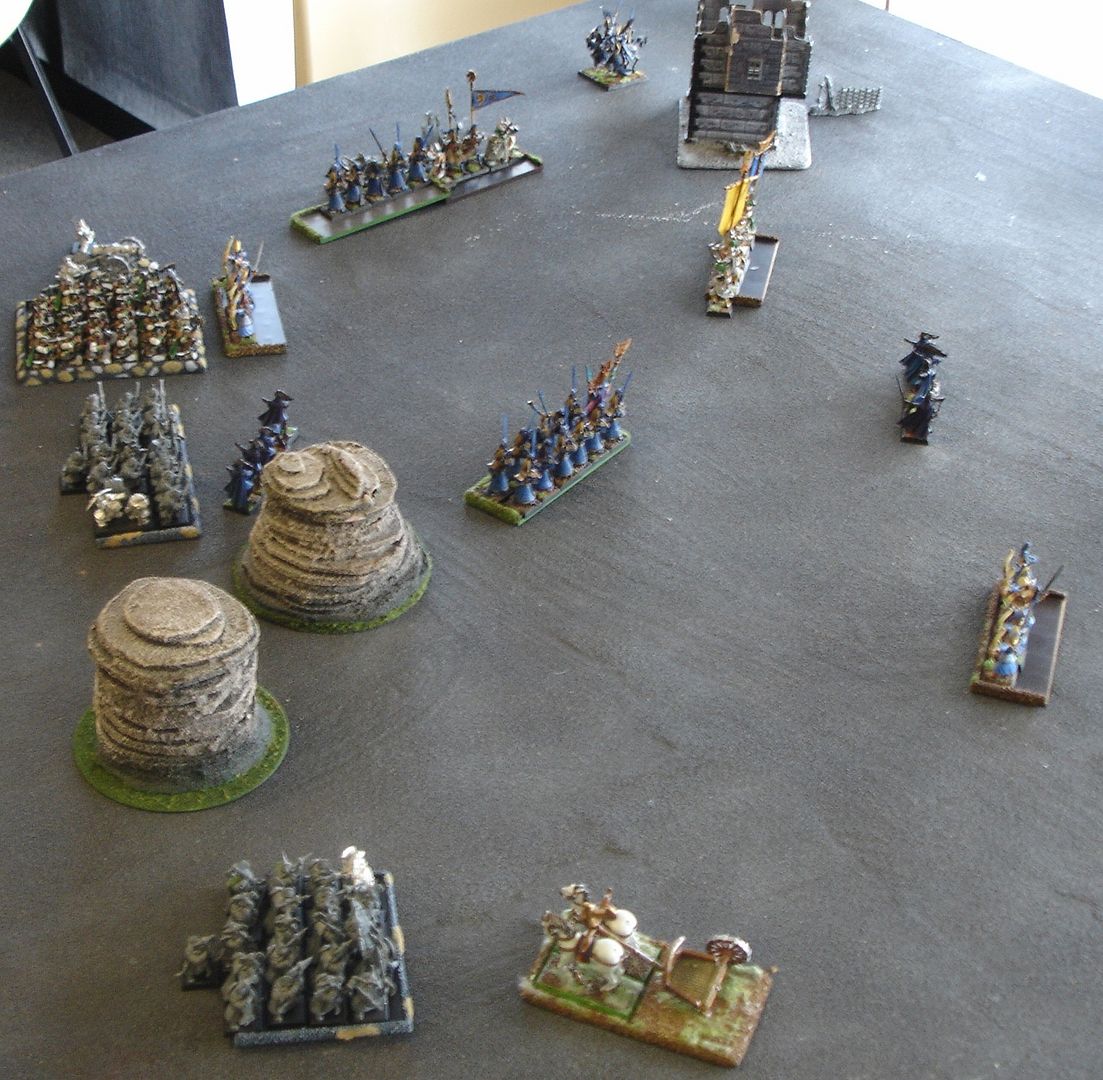
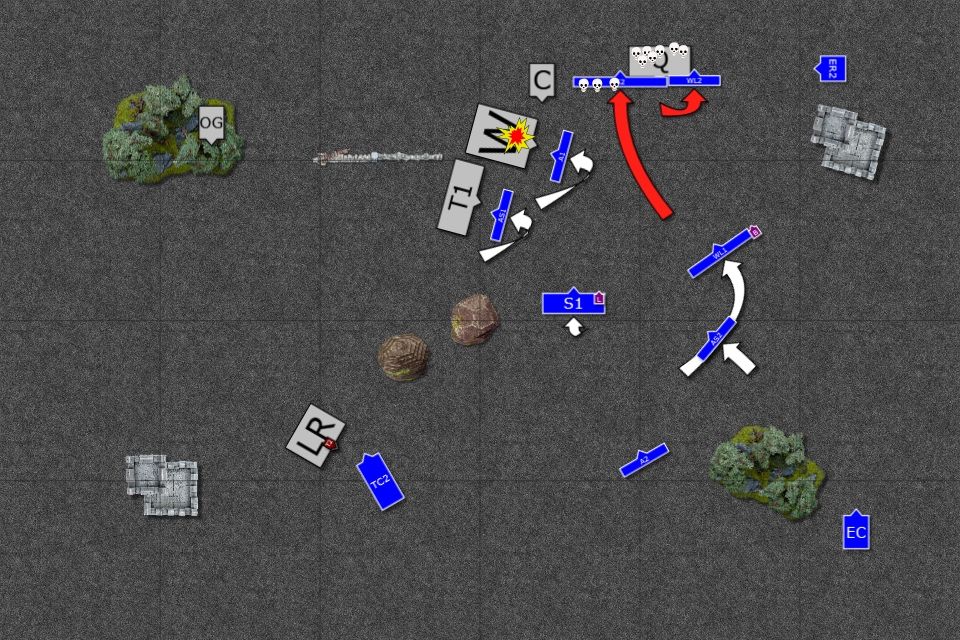
Outcasts - Turn 2
 |
| Rangers and their tricks! |
 |
| Left flank in trouble, right flank advances |
Silver Helms were about to move forward but the obscene gestures of the dwarven rangers offended their senses so much they decided it is beneath their dignity to fight against such a dishonorable foe and withdrew. Dragon Princes had to follow up to cover their retreat.
Rest of the regiments moved towards the enemy, quarrellers being the main target at the moment. Larry the Loremaster tried to help his warriors and aimed with a well placed fireball against the Grudge Thrower but a crew member still survived!
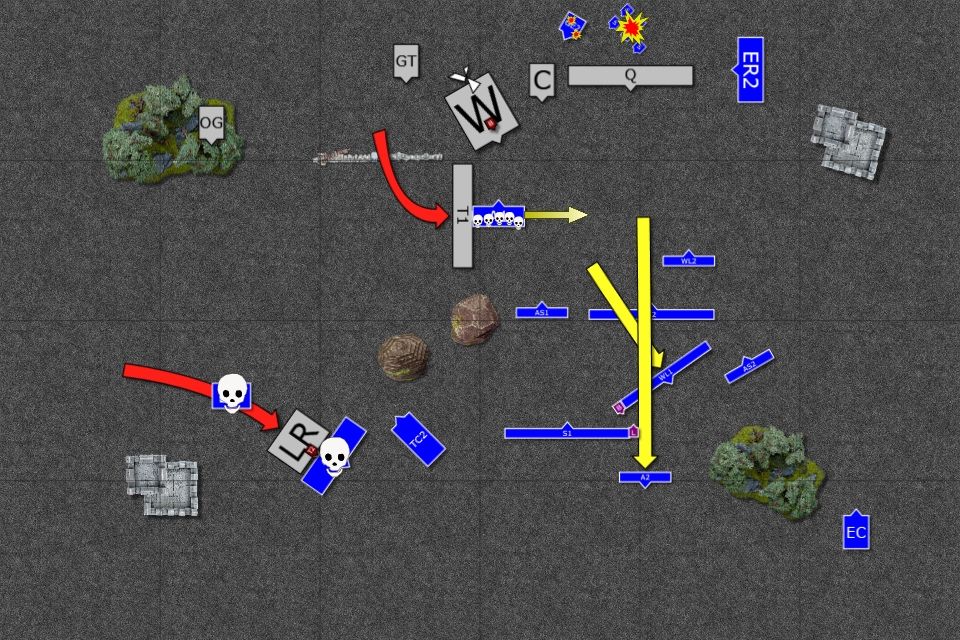
Dwarves - Turn 3
 |
| Rangers on the rampage! |
 |
| Things start to look very bad for Elves |
Rangers charge Dragon Princes, destroy them and even manage to catch fleeing Silver Helms. Elven left flank totally collapses!
In the centre, Thunderers charge exposed flank of the Archers who flee and trigger chain reaction. Not only that causes nearby lions to flee (Edit: Despite re-roll from the battle standard bearer!) but also panic second group of archers!
Cannon crew loads a grapeshot and Shadow Warriors are no more. Nearby great eagle is more lucky as it is wounded but not killed. Is that the end of the Elven attack?
Outcasts - Turn 3
 |
| First elven charges |
 |
| Elves attack but with mixed success (Edit: Please note the wrong angle of A1 archers) |
Despite a disastrous turn of events so far the Elves keep attacking. Great eagle enacts vengeance on the Grudge Thrower and destroys the last of the crew members. Ellyrian reavers attack the flank of the Dwarven crossbows and tie them in combat, preventing from shooting. Lions run towards them to be able to help out.
Dwarves - Turn 4
 |
| Reavers are repelled |
 |
| Dwarves form new battle line |
Quarrellers managed to fend off pesky light cavalry and reformed to face more dangerous foe. Warriors and Thunderers both reformed to make a new battle line while Rangers chased off the chariot.
Outcasts - Turn 4
 |
| Elves attack again! |
 |
| But the stubborn Dwarves refuse to give ground |
Swordmasters and White Lions charge together against quarrellers. Many Dwarves die but they hold, despite being affected by Iceshard Blizzard.
Archers and Sisters block the Dwarven regiments from joining the combat. Larry the Loremaster challenges Dwarven BSB to magical mental duel and manages to fry the brain of the stubborn Thane. Now Dwarves are truly leaderless.
Dwarves - Turn 5
 |
| Few Elves remain |
 |
| Quarrellers still hold! |
Dwarves keep shooting at advancing Elves and while group of sisters perishes then a some archers are still there. The combat between the Quarrellers and Elven warriors still continues! Dwarves can be really stubborn!
Outcasts - Turn 5
 |
| Last gamble! |
Seeing that only one more push can bring the victory to his bloodied army, Larry orders an attack and leads the charge himself. Swordmasters and While Lions finally finish the Quarrellers. Then Larry and his Swordmasters smash into Thunderrers. Many of them fall but also many Swordmasters die. Dwarves still lose and to everyone's surprise - they flee! Larry and last of the Swordmasters pursue and capture the standard. At this point Dwarven army is broken and Warriors decided to retreat too! What a turn of events!
Edit: I am not sure if I got the cannon but I guess I did as I was shooting with everything at it and I don't recall it shooting last turn.
Turn 6
I must apologize for the lack of diagrams for turn 6. We were in a hurry to finish it before the time was called and I didn't take pictures. I assume that the warriors rallied but the most important was the fact that Organ Gun had Loremaster and his companion as a target. Sam rolled and got "2". Not enough as I could distribute the hits evenly. Sam decided to re-roll and ... got a "4"! That meant that Larry survived the game and there were not bonus points for him! The gamble paid off this time!
Summary
 |
| Turn-by-turn summary animation |
After-battle thoughts
After turn 3 I thought there is not coming back for me. Left flank collapsed, I made some stupid mistakes and lost units instead of attacking war machines and on top of that my assault was stalled by fleeing units. But I am glad I pressed forward as there was really no turning back.
But let's start from the beginning.
The deployment was not good, in particular on the left flank. I didn't take into account ranger's mobility (especially with the anvil) properly. I thought I had them in check and blocked but that was a mistake that cost me cavalry. What is more I didn't move well and left enough space in between the regiments so that they could move in and challenge Silver Helms. I also moved these units too slow. As a result they were shot to pieces and defeated in combat.
I think I should have fled with Dargon Princes and if Sam redirected towards Silver Helms I would have had to flee with them again. Not going to save the day but at least the units had a chance to survive.
Moving in think lines looked good but with one Grudge Thrower I think it was a mistake. Sam pointed out that Anvil would have slowed me down significantly. Lucky me it blew up. And early too that allowed me to cast some magic. I compromise manoeuvrability with such formations.
Then in the rush to reach the enemy as quickly as possible I positioned Shadow Warriors too close and simply lost them. The same with Archers, who at least should have presented their front to both units. Somehow I assumed that thundereres will stay behind that wall forever.
But I didn't give up and it seemed to be a good decision! I managed to reach the enemy to get into combat on the right flank. It took way too long to beat these stubborn Dwarves but I did it. I also could use the opportunity to cast magic and finally got enemy BSB. Very important in the Blood and Glory scenario.
Last charge was a gamble but it paid off too! Why gamble? Because if I didn't break that unit I would have lost my general. But I needed these points because first, I got them for the unit and second, for reaching breaking point. Otherwise the result would have been very close. Not to mention that I had rangers rushing towards my general too.
We had some bad luck this game, Sam definitely more than me but I hope it was still enjoyable game for him. It was definitely for me as Sam was a great opponent! This time I managed to snatch the victory but who knows, maybe we will have a chance to re-match soon!
With all the bonus points and some comp difference the end result was: 16.75 - 3.25
Thanks for reading!
No comments:
Post a Comment